How to update a Dynamic Distribution Group Recipient Filter

During an Office 365 / Exchange Online migration, you may have a requirement to update the recipient filter of any dynamic distribution group.

In my case, I needed to do this because the dynamic distribution group used filters to include only mailboxes. But mailboxes that are migrated to Office 365 become mail-enabled users in the on-premises directory. This can cause issues with certain members of a dynamic distribution group not receiving email messages. The issue is described here

The process is quite simple… using the Set-DynamicDistributionGroup to update the recipient filter to include the MailUser and MailContact.  What can be tricky however is getting the syntax correct.

The following is an example of the process and syntax I used to update a Dynamic Distribution Group to include mail enabled users:

  1. First, I got the original recipient filter details but running the following command

Get-DynamicDistributionGroup -Identity DDGName  |fl RecipientFilter

  1. I then took a copy of the original recipient filter which was as follows:

“((((RecipientType -eq ‘UserMailbox’) -and (((MemberOfGroup -eq ‘CN=grpUsers1,OU=Domain Groups,DC=domain,DC=ie’) -or (MemberOfGroup -eq ‘CN=grpUsers2,OU=Domain Groups,DC=domain,DC=ie’))))) -and (-not(Name -like ‘SystemMailbox{*’)) -and (-not(Name -like ‘CAS_{*’)))”

  1. I then added the MailUser and MailContact recipient type (highlighted in bold) to the recipient filter and used the Set-DynamicDistributionGroup with the following syntax to update the recipient filter:

Set-DynamicDistributionGroup -identity “DDGName” -RecipientFilter “((((RecipientType -eq ‘UserMailbox’) -or (RecipientType -eq ‘MailUser’) -or (RecipientType -eq ‘MailContact’) -and (((MemberOfGroup -eq ‘CN=grpUsers1,OU=Domain Groups,DC=domain,DC=ie’) -or (MemberOfGroup -eq ‘CN=grpUsers2,OU=Domain Groups,DC=domain,DC=ie’))))) -and (-not(Name -like ‘SystemMailbox{*’)) -and (-not(Name -like ‘CAS_{*’)))”


Office 365 Mailbox Migration Planning Script

Every user mailbox in Exchange Online requires an Office 365 license to be assigned to the user.  Often when migrating from Exchange On-premises, there are more user mailboxes than actual users, and more importantly, more user mailboxes than Office 365 licenses.  In this scenario, a number of options can be considered including:

  1. Migrate user mailbox (requires an Office 365 license)
  2. Decommission user mailbox (redundant)
  3. Convert user mailbox to shared mailbox and migrate (no Office 365 license required)

The following script combines the output from Get-Mailbox and Get-MailboxStatistics against all mailboxes into a CSV file to help make a more informed decision about what to do with the excess of mailboxes in an on-premises environment.  Information captured includes:

  1. Display Name
  2. Primary SMTP Address
  3. Account Disabled
  4. Is Mailbox Enabled
  5. Is Shared
  6. Is Resource
  7. Is root Public Folder Mailbox
  8. Organization Unit
  9. Last Logon Time
  10. Total Item Size

You can download the script from the Technet Gallery here

1

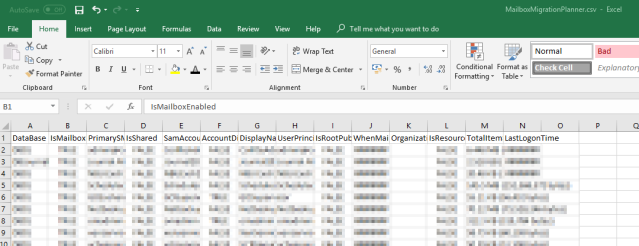
Run the script from the Exchange Management Shell (EMS).  Once complete, I usually convert the CSV to an Excel file as follows so I can filter on the different attributes / fields

  1. Open the CSV file using Microsoft Excel
  2. Highlight / select all the rows and columns with data, select the “Insert” Tab, click on “Table”
2

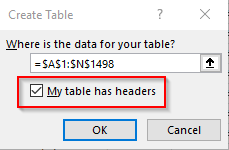
3. Make sure to tick “My table has headers”, the click OK

3

4. Now you have an excel spreadsheet, in table format with filters, with detailed information about all your mailboxes

4

How to enable, verify and test Litigation Hold in Office 365 – Step by Step

How to enable, verify and test Litigation Hold in Office 365 – Step by Step

In this blog post, I’ll demonstrate step by step how to enable, verify and test litigation hold in Office 365.  I’ll be focusing specifically on the Exchange Online workload.

  1.  Enabled Litigation Hold

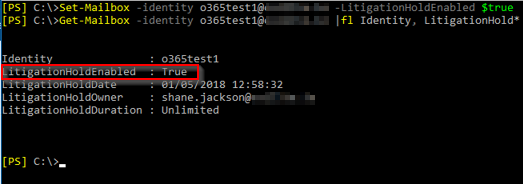
You can enable litigation hold for a mailbox by running the following command from the Exchange Online shell (note:  steps to connect PowerShell to Exchange Online can be found here)

Set-Mailbox -identity o365test1@domain.ie -LitigationHoldEnabled $true

lit1

You can enable litigation hold for all users using the following command

Get-Mailbox -RecipientTypeDetails UserMailbox -Filter {PersistedCapabilities -eq “BPOS_S_Enterprise” -and LitigationHoldEnabled -ne $true}

If you want to automate the process, so that when new mailboxes are created they are automatically enabled for litigation hold, please see this blog from Vasil Michev.

2.  Verify Litigation Hold is enabled

To verify Litigation hold is enabled, run the following command

Get-Mailbox -identity o365test1@domain.ie |fl Identity, LitigationHold*

lit2

3.  How to test litigation hold

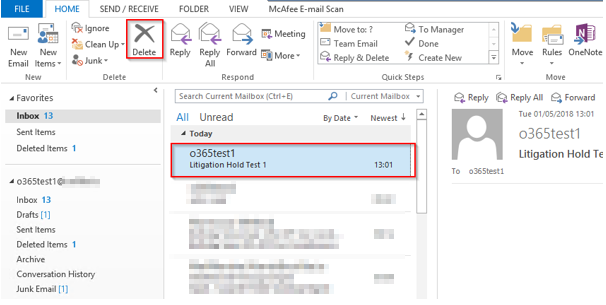
In the next steps we are going to delete an email so that it cannot be retrieved by the end users in Outlook, and then as an admin perform a search in the Office 365 portal to retrieve the email.

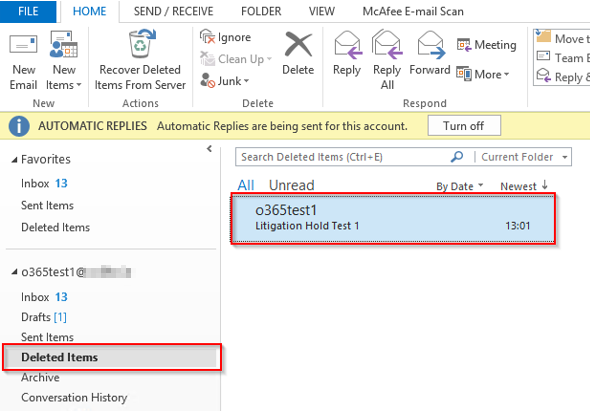
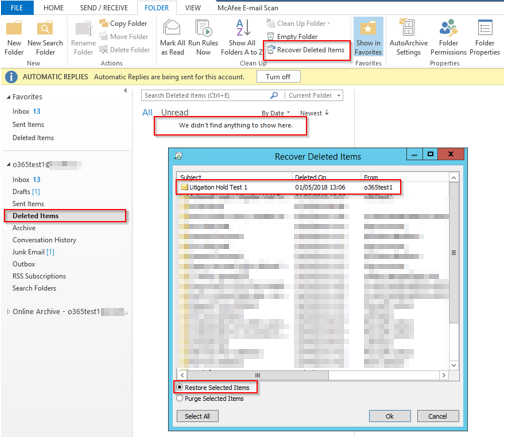
When a user deletes an item, it goes to the deleted items folder, where it can be recovered by the end user.

lit3

lit4

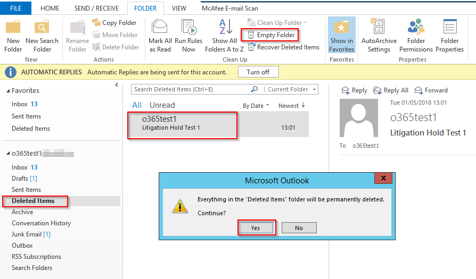
If the item is emptied / deleted from the “Deleted items” folder,

lit5

it goes into the “recoverable items”, where it can still be retrieved by the end user

Note:  14 days retention period for items removed from the Deleted Items folder, after which they cannot be retrieved by the end user. (Details here).

lit6

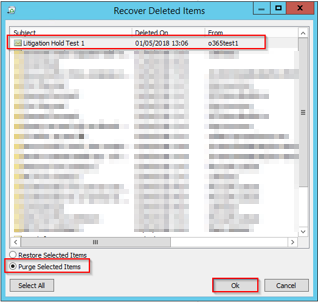
Once the item is removed from the Deleted Items folder (either automatically by Office 365 after 14 days, or manually by the end user choosing “Purge Selected Items”), it is no longer retrievable by the end user

lit7

If the mailbox is on litigation hold, the item can be retrieved by an Office 365 Administrator.  If the mailbox is not on litigation hold, the item cannot be retrieved.

Next, we will use Office 365 e-Discovery search to retrieve an item that has been deleted from the Delete Items folder, for a mailbox that is on litigation hold

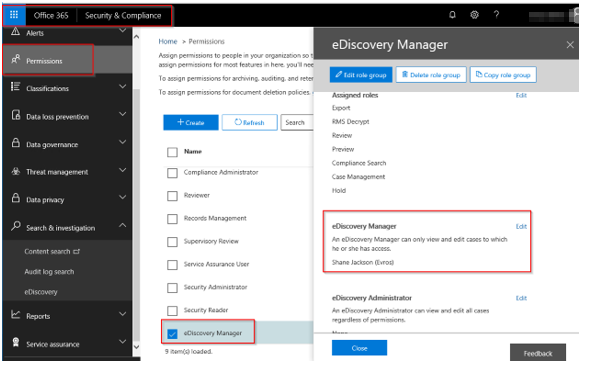
Log into the Office 365 portal (https://portal.office.com) with an account that has a minimum of E-Discovery Manager permissions and navigate to the Security & Compliance admin centre

Note:  E-Discovery Manager permissions are set here

lit8

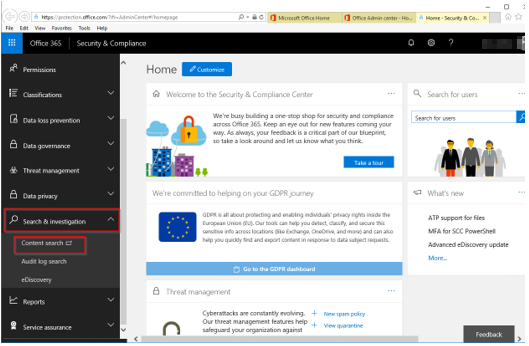
Navigate to the Security & Compliance admin centre

lit9

Navigate to Search & Investigation and choose “Content Search”

lit10

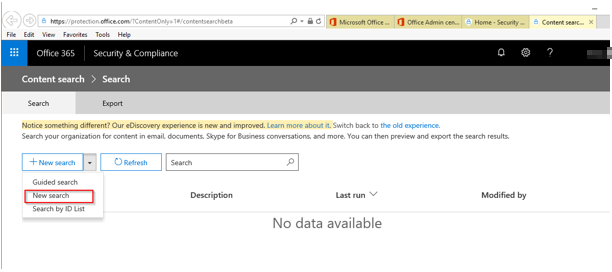
Choose “New Search”

lit11

Under Locations > Specific locations click Modify

lit12

For “Exchange Email”, select “Choose users”

lit13

Search for required user

lit14

In Keywords, add a “condition” to filter the search for specific details about the email to be retrieved.  Then click Save & Run

lit15

lit16

Enter a description for the Search

lit17

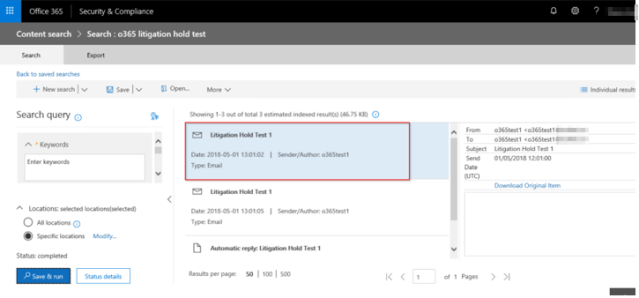
The results show the mail item to be retrieved

lit18

There are a few options here as to how the email item is recovered into the mailbox

  1. Export to EML file
  2. Export to PST file


Export to EML File

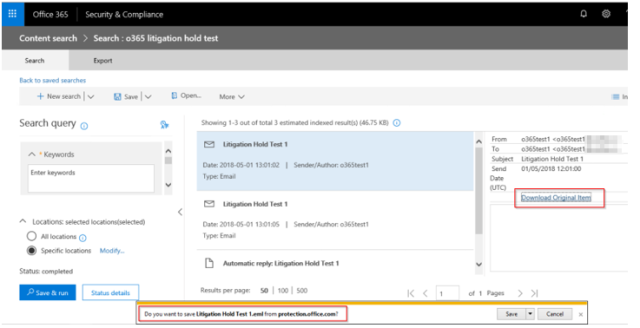
For single email items, you can choose “Download Original Item”.  This will allow you to save the email as an .EML file

lit19

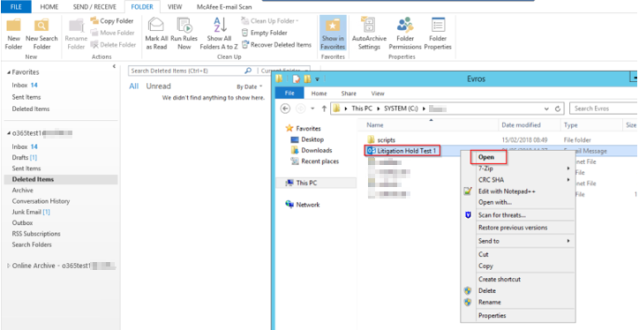
The file can then be open on a client that has Outlook installed

lit20

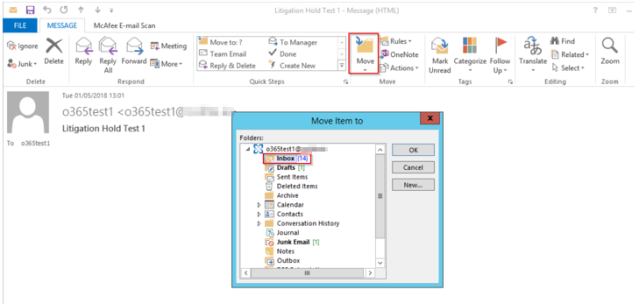
lit21

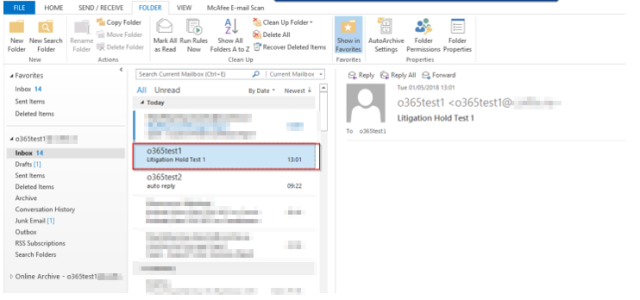
And saved back into the mailbox using the “Move” option

lit22

lit23

Export to PST file

For recovery of many items, exporting to PST file might be a better option

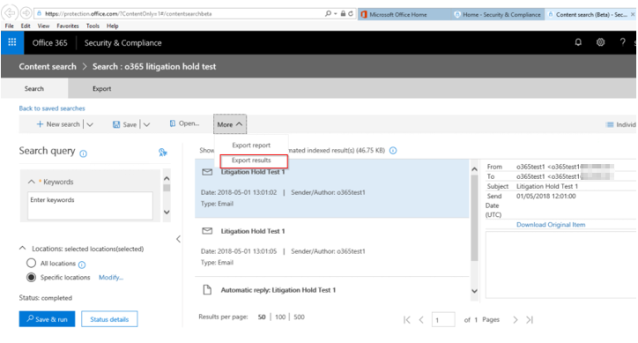
From the results preview, choose More > Export Results

lit24

Choose export options and then select EXPORT

lit25

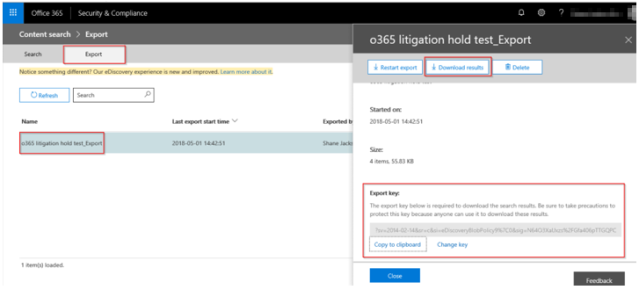
Click on the EXPORT tab, copy the export key, and then select “Download Results”

lit26

Click to install the Microsoft Office 365 eDiscovery Export Tool

lit27

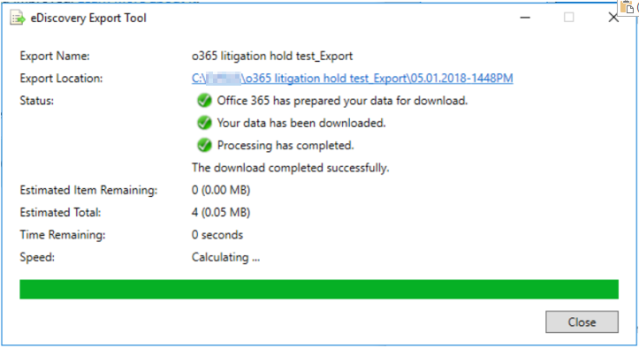
Paste the export key and choose a download location, click start

lit28

lit29

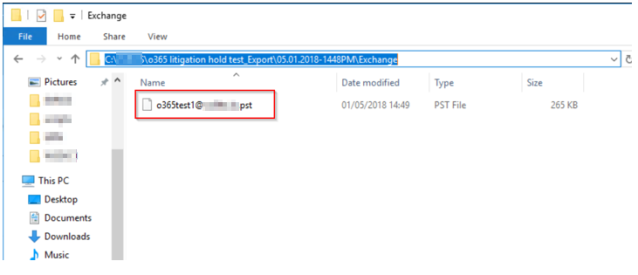
When complete, a pst file is created

lit30

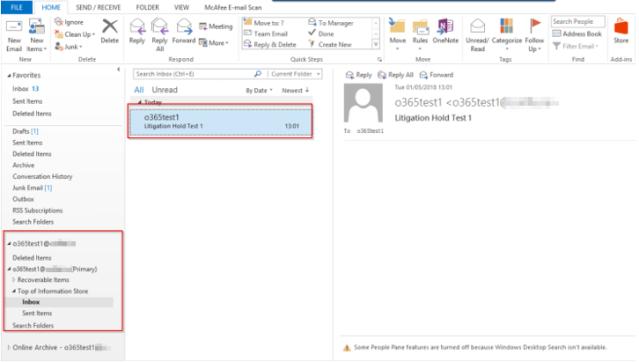
Finally, this can then be opened using outlook and / or imported into the mailbox

lit31

That’s all for now, hope you found it useful.

Outlook client can’t connect to Exchange 2016 – continually prompts for login credentials

Problem

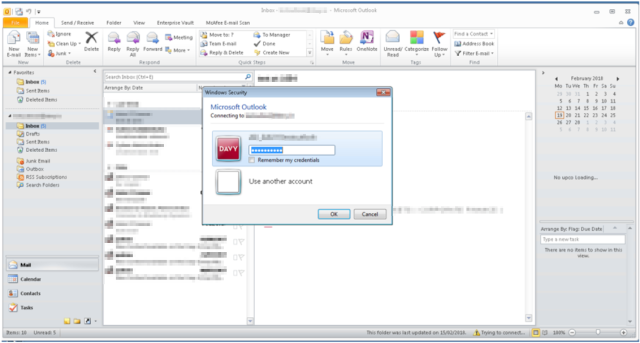
I came across this issue while working on an Exchange Hybrid deployment.  During the testing phase, I successfully migrated mailboxes from Exchange 2010 to Exchange Online.  However, when I migrated a mailbox from Exchange 2010 to Exchange 2016, my Outlook client could not connect to its mailbox and would continually prompt for login credentials

LoginPrompt1

Note:  On my test client, the Exchange namespaces were all pointing to Exchange 2016.

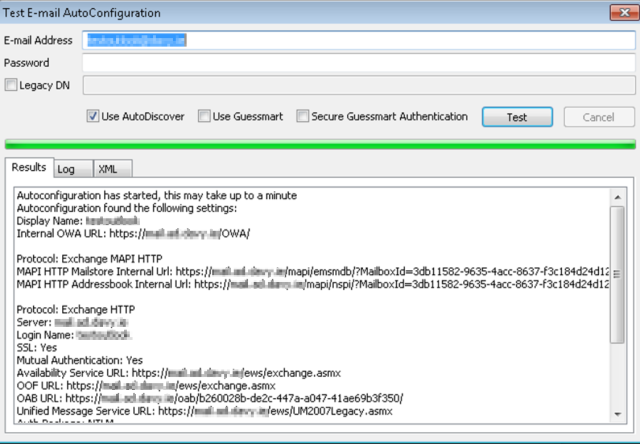
What was interesting was that the Autodiscover process was working, with the Outlook client successfully retrieving its URL’s, as verified using “Test-Email AutoConfiguration”

LoginPrompt2

This indicated that my outlook client was successfully connecting to the autodiscover virtual directory.  My attention turned towards the MAPI virtual directory as I could see 401 errors in the IIS logs.

 Solution

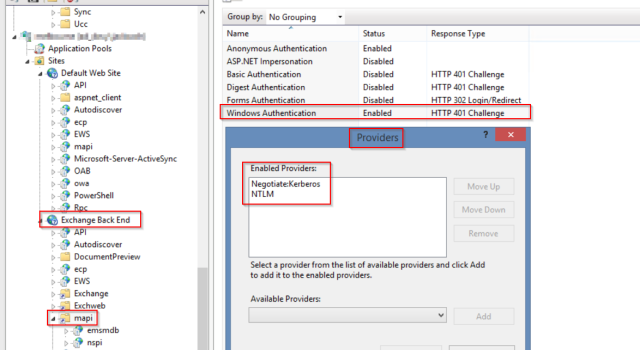
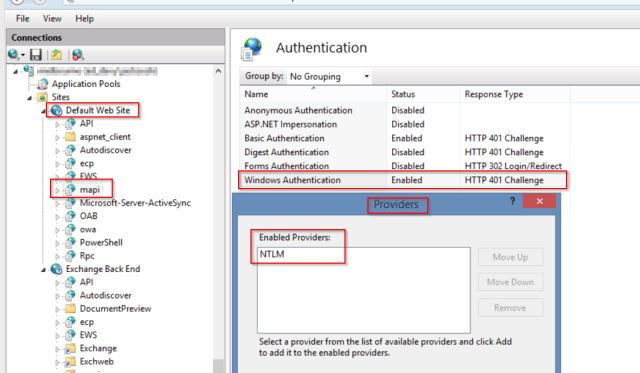
The solution in my case was to configure the authentication settings via IIS on the MAPI front end and back end virtual directories as follows:

LoginPrompt3

LoginPrompt4

After an IISRESET, my Outlook client connected succesfully