Office 365 Mailbox Migration Planning Script

Every user mailbox in Exchange Online requires an Office 365 license to be assigned to the user.  Often when migrating from Exchange On-premises, there are more user mailboxes than actual users, and more importantly, more user mailboxes than Office 365 licenses.  In this scenario, a number of options can be considered including:

  1. Migrate user mailbox (requires an Office 365 license)
  2. Decommission user mailbox (redundant)
  3. Convert user mailbox to shared mailbox and migrate (no Office 365 license required)

The following script combines the output from Get-Mailbox and Get-MailboxStatistics against all mailboxes into a CSV file to help make a more informed decision about what to do with the excess of mailboxes in an on-premises environment.  Information captured includes:

  1. Display Name
  2. Primary SMTP Address
  3. Account Disabled
  4. Is Mailbox Enabled
  5. Is Shared
  6. Is Resource
  7. Is root Public Folder Mailbox
  8. Organization Unit
  9. Last Logon Time
  10. Total Item Size

You can download the script from the Technet Gallery here

1

Run the script from the Exchange Management Shell (EMS).  Once complete, I usually convert the CSV to an Excel file as follows so I can filter on the different attributes / fields

  1. Open the CSV file using Microsoft Excel
  2. Highlight / select all the rows and columns with data, select the “Insert” Tab, click on “Table”

2

3. Make sure to tick “My table has headers”, the click OK

3

4. Now you have an excel spreadsheet, in table format with filters, with detailed information about all your mailboxes

4

How to enable, verify and test Litigation Hold in Office 365 – Step by Step

How to enable, verify and test Litigation Hold in Office 365 – Step by Step

In this blog post, I’ll demonstrate step by step how to enable, verify and test litigation hold in Office 365.  I’ll be focusing specifically on the Exchange Online workload.

  1.  Enabled Litigation Hold

You can enable litigation hold for a mailbox by running the following command from the Exchange Online shell (note:  steps to connect PowerShell to Exchange Online can be found here)

Set-Mailbox -identity o365test1@domain.ie -LitigationHoldEnabled $true

lit1

You can enable litigation hold for all users using the following command

Get-Mailbox -RecipientTypeDetails UserMailbox -Filter {PersistedCapabilities -eq “BPOS_S_Enterprise” -and LitigationHoldEnabled -ne $true}

If you want to automate the process, so that when new mailboxes are created they are automatically enabled for litigation hold, please see this blog from Vasil Michev.

2.  Verify Litigation Hold is enabled

To verify Litigation hold is enabled, run the following command

Get-Mailbox -identity o365test1@domain.ie |fl Identity, LitigationHold*

lit2

3.  How to test litigation hold

In the next steps we are going to delete an email so that it cannot be retrieved by the end users in Outlook, and then as an admin perform a search in the Office 365 portal to retrieve the email.

When a user deletes an item, it goes to the deleted items folder, where it can be recovered by the end user.

lit3

lit4

If the item is emptied / deleted from the “Deleted items” folder,

lit5

it goes into the “recoverable items”, where it can still be retrieved by the end user

Note:  14 days retention period for items removed from the Deleted Items folder, after which they cannot be retrieved by the end user. (Details here).

lit6

Once the item is removed from the Deleted Items folder (either automatically by Office 365 after 14 days, or manually by the end user choosing “Purge Selected Items”), it is no longer retrievable by the end user

lit7

If the mailbox is on litigation hold, the item can be retrieved by an Office 365 Administrator.  If the mailbox is not on litigation hold, the item cannot be retrieved.

Next, we will use Office 365 e-Discovery search to retrieve an item that has been deleted from the Delete Items folder, for a mailbox that is on litigation hold

Log into the Office 365 portal (https://portal.office.com) with an account that has a minimum of E-Discovery Manager permissions and navigate to the Security & Compliance admin centre

Note:  E-Discovery Manager permissions are set here

lit8

Navigate to the Security & Compliance admin centre

lit9

Navigate to Search & Investigation and choose “Content Search”

lit10

Choose “New Search”

lit11

Under Locations > Specific locations click Modify

lit12

For “Exchange Email”, select “Choose users”

lit13

Search for required user

lit14

In Keywords, add a “condition” to filter the search for specific details about the email to be retrieved.  Then click Save & Run

lit15

lit16

Enter a description for the Search

lit17

The results show the mail item to be retrieved

lit18

There are a few options here as to how the email item is recovered into the mailbox

  1. Export to EML file
  2. Export to PST file


Export to EML File

For single email items, you can choose “Download Original Item”.  This will allow you to save the email as an .EML file

lit19

The file can then be open on a client that has Outlook installed

lit20

lit21

And saved back into the mailbox using the “Move” option

lit22

lit23

Export to PST file

For recovery of many items, exporting to PST file might be a better option

From the results preview, choose More > Export Results

lit24

Choose export options and then select EXPORT

lit25

Click on the EXPORT tab, copy the export key, and then select “Download Results”

lit26

Click to install the Microsoft Office 365 eDiscovery Export Tool

lit27

Paste the export key and choose a download location, click start

lit28

lit29

When complete, a pst file is created

lit30

Finally, this can then be opened using outlook and / or imported into the mailbox

lit31

That’s all for now, hope you found it useful.

Troubleshooting the Office 365 Hybrid Configuration Wizard

In this blog post I want to share some tips for identifying issues when running the Office 365 Hybrid Configuration Wizard (HCW), available here .

Specifically,

  1. Where to find the Hybrid Configuration Wizard logs
  2. How to identify network related issues

In my experience, network relates issues are the most common cause of HCW failures, and that is where this blog post will focus.   Most corporate networks have firewall and / or proxy restrictions in place.  There are very specific network requirements for connectivity to Office 365 as detailed here .

There is usually a separate network team responsible for implementing the firewall and proxy rules required.   It can be time consuming and frustrating going back and forth between different teams when troubleshooting issues.  This post will demonstrate how to get some visibility of the what’s going on when the HCW is running (in particular on the network side), so that when you engage with the other teams (network / security etc) you have some evidence to back up your suspicions.

Where to find the Hybrid Configuration Wizard logs

The HCW writes a very detailed log which is very useful for troubleshooting.  Jetze Mellema explains here where you can find the log.   For example, here is the location of my HCW log from a recent deployment

C:\Users\jackson_s_admin\AppData\Roaming\Microsoft\Exchange Hybrid Configuration

hcw1

This log provides very detailed information and is a good place to start when troubleshooting.  In some cases, it can be very clear where the problem is.  In the example below, there is a problem accessing the office 365 URL’s via the internet proxy

hcw2

In other cases, we can see errors in the log, (even though in this case the GUI did not show any errors), but its not exactly clear what the cause is.

hcw3

2018.04.24 13:34:43.206 *ERROR* 10277 [Client=UX, Activity=Domain Ownership, Session=OnPremises, Cmdlet=Set-FederatedOrganizationIdentifier, Thread=12] FINISH Time=1341.1ms Results=PowerShell failed to invoke ‘Set-FederatedOrganizationIdentifier’: An error occurred while attempting to provision Exchange to the Partner STS.  Detailed Information “An error occurred accessing Windows Live. Detailed information: “Unable to connect to the remote server”.”.

Looking at the details of this error for example, I have some clue to the cause – Error accessing Windows Live.  My suspicion at this point is network / proxy.  But how can I prove this before engaging with the network support team?  …. By running a network trace and analysing the results (as described next)!


How to identify network related issues

There are lots of tools and different ways to identify network related issues.  Detailed below is just one simple approach (but definitely not the only one)

On your Hybrid server, open PowerShell (or a command prompt) and run the following command to start a network trace


netsh trace start persistent=yes capture=yes tracefile=c:\temp\HCW_Trace.etl


hcw4

Next, recreate the issue you are having with the Office 365 Hybrid Configuration Wizard (HCW).  In this example, the HCW was failing to connect to outlook.office365.com

hcw5

Next go back to PowerShell (or a command prompt) and run the following command to stop the network trace

Netsh trace stop

hcw6

Now, there are tools such as Network Monitor that can be used to view the trace file (ETL) as described here .  However, a popular network analyser that I like to use is Wireshark.  But before we can analyse the network trace using Wireshark, we need to convert it from .ETL to .CAP as described here.

Converting trace file (ETL) it into a Wireshark compatible format

On your pc, download and install the Microsoft Message Analyzer from here .  Open the NETTRACE.ETL (created previously) using Microsoft Message Analyzer.

hcw7

Choose FILE > SAVE AS and then select Export to save the file as NETTRACE.CAP

hcw8

Analyze using Wireshark

Download and install Wireshark from here . Open the NETTRACE.CAP file for analysis

hcw9

At this point, we can apply one or more filters to help narrow the information down and search for any errors.  This site has some good tips of applying filters .  In this example, I am going to filter on the HTTP protocol, by typing http into the filter tab

hcw10

In this example I can see that the internet proxy is indeed blocking access to outlook.office365.com, and now I have some evidence to go back to the network team with.

Good luck with your troubleshooting

Outlook client can’t connect to Exchange 2016 – continually prompts for login credentials

Problem

I came across this issue while working on an Exchange Hybrid deployment.  During the testing phase, I successfully migrated mailboxes from Exchange 2010 to Exchange Online.  However, when I migrated a mailbox from Exchange 2010 to Exchange 2016, my Outlook client could not connect to its mailbox and would continually prompt for login credentials

LoginPrompt1

Note:  On my test client, the Exchange namespaces were all pointing to Exchange 2016.

What was interesting was that the Autodiscover process was working, with the Outlook client successfully retrieving its URL’s, as verified using “Test-Email AutoConfiguration”

LoginPrompt2

This indicated that my outlook client was successfully connecting to the autodiscover virtual directory.  My attention turned towards the MAPI virtual directory as I could see 401 errors in the IIS logs.

 Solution

The solution in my case was to configure the authentication settings via IIS on the MAPI front end and back end virtual directories as follows:

LoginPrompt3

LoginPrompt4

After an IISRESET, my Outlook client connected succesfully

Azure AD Connect – The remote server returned an error: (407) Proxy Authentication Required

Azure AD Connect – The remote server returned an error: (407) Proxy Authentication Required

Problem

Get the following error running Azure Active Directory Connect

“The remote server returned an error: (407) Proxy Authentication Required”

1

Environment

Internet access via internet explorer is working on the server where I’m running Azure AD Connect

2

There is a proxy server in the environment (WebMarshal in this case), and a PAC file is used to configure the proxy settings

3

WinHTTP is configured without a proxy

4

Troubleshooting

As per this link , error 407 indicates:

“The proxy server required a sign-in and none was provided. If your proxy server requires authentication, make sure to have this setting configured in the machine.config.”

Solution

The solution is to modify the following file to specify the proxy configuration required

C:\Windows\Microsoft.NET\Framework64\v4.0.30319\Config\machine.config

As per this article the following section needs to be added to the machine.config file, specifying the proxy server name or IP and port number

<system.net>

<defaultProxy enabled=”true” useDefaultCredentials=”true”>

<proxy

usesystemdefault=”true”

proxyaddress=”http://<PROXYADDRESS&gt;:<PROXYPORT>”

bypassonlocal=”true”

/>

</defaultProxy>

</system.net>

Note:  Be careful where you place this additional section or you may receive the following error running Azure AD Connect

5

The additional lines need to be added to the end of the machine.config file, but before the last </configuration>

6


Mailbox Management & SSO after Office 365 Hybrid Migration

So you are coming to the end of an Exchange Online Hybrid migration, and are considering decommissioning the on-premise Hybrid Exchange server.  Are there any considerations that need to be taken into account?

By the end of the mailbox migrations, you may have configured Azure AD Sync and made the on-premises Active Directory the source of authority. Therefore, going forward, you must perform any required changes on the objects in the on-premises Active Directory and not in Office 365, as most attributes on  are read only.

You may also have also configured identity federation via ADFS in order to achieve single sign-on (SSO). With ADFS configured, you must create new users via the on-premises Active Directory to use SSO.

Active Directory users also need to be created with the required mail attributes in order for Exchange Online to accept the object and convert to mail enabled user. This can be done without an on-premise Exchange. Active Directory Users and Computers will create the required mail related attributes:

  • mail
  • proxyAddresses
  • targetAddress

Once synchronized, you can assign it an Exchange license in order to make it a mailbox-enabled object.

However, you may need to enable more advanced Exchange features on the object e.g.

  • hiding the object from the global address list
  • adding additional email addresses

While this is possible using ADSI Edit the Exchange Product Group doesn’t support this approach.  The Exchange Product Group recommends you keep an Exchange server with the Mailbox role on-premises even if all your mailboxes are located in Exchange Online.  This blog has some further references

Note
If you deploy an on premise Exchange for Hybrid management only (i.e. no mailboxes) you can apply for an Exchange Hybrid Key at no cost here .

Active Directory Federation Service (ADFS) Design Considerations and Deployment Options

Lately I have been working more and more with ADFS, mainly because of the Office 365 / Exchange Hybrid / Exchange Online deployments I have been doing.

So I thought I share my experiences, what I have learned and resources I’ve used.  In this blog post I’ll be covering the following:

  1. Overview of ADFS
  2. ADFS Deployment Steps
  3. ADFS Sizing
  4. Publishing ADFS externally (ADFS Proxy)
  5. High Availability
  6. Disaster Recovery
  7. ADFS Configuration Database – WID or SQL?
  8. Using ADFS for Conditional Access
  9. How to migrate ADFS from one server / farm to another
  10. Switching Office 365 Identity Model from Cloud Only to Federated (ADFS)
  11. ADFS Backup
  12. Troubleshooting ADFS
  13. What if ADFS can’t be recovered?

You can also download this full article from the Technet Gallery here

1.  Overview of ADFS

What is ADFS? As described here

  • AD FS is a standards-based service that allows the secure sharing of identity information between trusted business partners (known as a federation) across an extranet

For all the ADFS deployments I have done, I can describe its function as follows

  • Provides a mechanism for authentication to Office 365 services to be made against the customers on-premise Active Directory

The following diagram illustrates ADFS providing an authentication mechanism to Office 365

ADFSOverview

Of course, this authentication service is not limited Office 365 and can be utilized with other 3rd parties

2. ADFS Deployment Steps

There are of number of great blogs describing step by step how to deploy ADFS.  The most comprehensive step by step guide I have come across for deploying Exchange Hybrid, and integrating with ADFS for single sign on, is from Henrik Walther  on msexchange.org and is available from the following link

Key thing when following these guides is to ensure that the version of ADFS you are deploying matches the steps described in the blog.  There are differences in the steps for ADFS 2.0 and ADFS 3.0

Other ADFS deployment guides include

This ADFS 2012 R2 guide from Rhoderick Milne  covers 3 elements

  1. Install ADFS
  2. Install ADFS Proxy
  3. Leverage ADFS with Office 365
3. ADFS Sizing

This link provides guidelines for hardware requirements (memory, CPU etc.) for federation servers and federations proxies.

H/W Requirement Minimum Recommended
CPU Speed Single Core, 1 GHz Quad Core, 2Ghz
RAM 1 GB 4 GB
Disk Space 50 MB 100 MB

However, as per this link,  based on following server specification

H/W Requirement Recommended
CPU Speed Dual Quad Core, 2Ghz
RAM 4 GB
Disk Space 100 MB

The number of users per server is as follows

Number of Users Number of Servers
< 1000 Can deploy ADFS on 2 existing Domain Controllers.  Then load balance with separate NLB servers

Can deploy ADFS proxy on existing web servers

1000-15000 2 dedicated federation servers

2 dedicated proxy servers

15,000-60,000 3-5 dedicated federation servers

2 dedicated proxy servers

I have come across this calculator to calculate how many AD FS servers are required. However, I didn’t find this very useful.  According to the calculations, a single ADFS server can service 50,000 internal users and 50,000 external users authenticating to 3 external applications and 1 internal application.  I wouldn’t trust these calculations and would stick to the previous table.

4. Publishing ADFS Externally

 ADFS can be published externally using an ADFS proxy as illustrated in this diagram

ADFSProxy

The process is documented very well in the links provided earlier in this blog.

However, the name ADFS Proxy suggests that it is an ADFS role that is performing the proxy. Prior to Windows 2012 R2 it was.  However, with Windows 2012 R2 the ADFS Proxy role has been removed and we now use the Web Application Proxy (WAP).  The reason I mention this is that the WAP service can provide reverse proxy functionality for other applications such as Skype for Business and Exchange as described here

5. High Availability

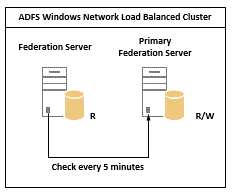
High availability for ADFS can be achieved by deploying two or more federation servers in a farm, and load balancing using Windows Network Load balancing (WNLB).  Changes to the ADFS configuration database (WID) are replicated automatically every 5 mins to every server in the farm.  The primary server holds a read / write copy of the WID database while the other federation servers in the farm hold a read only copy

ADFSHA

The process is described in detail here . The ADFS Proxy can also be made highly available using Windows Network Load balancing (WNLB) in the same way.

It is possible, and supported, to deploy an ADFS farm across two sites in an Active / Active configuration as illustrated in the following diagram:

ADFSMultiSite

Load balancers with Global Load Balancing Service (GLBS) capability would need to be deployed in both sites internally.  Also externally, a GLBS service would be required (e.g. http://www.cloudfloordns.com/)

This link describes the scenario and also the implications / considerations if deploying ADFS components in Azure

6. Disaster Recovery

A DR solution for ADFS could include deploying an additional ADFS server, and ADFS proxy server in a second datacentre.  The following diagram illustrates the solution

ADFSDR

The built-in ADFS farm replication will ensure the ADFS configuration is replicated between all servers in the farm every 5 minutes by default (assuming there is network connectivity between the datacentres)

This process to failover is described here

It’s a straightforward process that involves the following steps

  1. Point the internal and external DNS names for ADFS to the DR server
  2. Convert the DR ADFS server to the primary server
7. ADFS Configuration Database – Windows Internal Database (WID) or SQL?

Another consideration is which database option to choose.  For most AD FS deployments, Microsoft recommends the Federation Server Farm with WID and Proxies deployment topology as the default choice.  This has been the case in all the deployments I have completed.

Yes, WID is limited to only 5 servers in the farm, but this has been more than enough for any deployments I have been looking as.  As per this link, we can see that each ADFS server can support 15,000 users.  So 3 ADFS in production, and 2 in DR, can provide HA in production (1 server failure) and DR for 30,000 users.    So far this has covered all the ADFS deployments I have done.

There are two main reason that I can think of as to why you would add the complexity, overhead and computing resources required for SQL clustering or mirroring to an ADFS design:

  1. Providing HA & DR for more than 30,000 users (i.e. can have more than 5 ADFS servers)
  2. Geographic load balancing (Active / Active across two datacentres), where network limitations prevent replication between the primary and secondary farm servers. SQL allows merged replication, and targeting of the nearest SQL node which lowers latencies and improves the overall experience

A comparison of WID vs SQL can be found here.

And Yes, it is possible to migrate from WID to SQL as described here

8. Conditional Access

Another benefit to deploying ADFS is that we can use it to control access to Office 365 services.  ADFS includes the following 4 client access policies:

Scenario Description
Block all external access to Office 365 Office 365 access is allowed from all clients on the internal corporate network, but requests from external clients are denied based on the IP address of the external client.
Block all external access to Office 365 except Exchange ActiveSync Office 365 access is allowed from all clients on the internal corporate network, as well as from any external client devices, such as smart phones, that make use of Exchange ActiveSync. All other external clients, such as those using Outlook, are blocked
Block all external access to Office 365 except browser-based applications Blocks external access to Office 365, except for passive (browser-based) applications such as Outlook Web Access or SharePoint Online
Block all external access to Office 365 except for designated Active Directory groups This scenario is used for testing and validating client access policy deployment. It blocks external access to Office 365 only for members of one or more Active Directory group. It can also be used to provide external access only to members of a group.

Full details of these policies and how to configure them can be found here:

9. Migrate ADFS from one server / farm to another

I have come across the scenario whereby my customer has an existing ADFS deployment with no HA or DR, but required both.

In this scenario I will build out a new ADFS HA & DR solution, and will not try to retro fit HA into a live ADFS deployment.  The reasons for this are:

  1. I would have to make changes to the ADFS live environment during the deployment
  2. I would have to take the live ADFS offline to test HA and DR.

If I build a new ADFS in parallel, I can export the configuration and settings from the existing ADFS and fully test before going live.  The go live is a simple DNS change (both internal and external) to point the ADFS namespace e.g. sts.domain.local at the new ADFS infrastructure.

The following links describe the migration process:

  1. Prepare to Migrate the AD FS 2.0 Federation Server
  2. Prepare to Migrate the AD FS 2.0 Federation Server Proxy
  3. Migrate the AD FS 2.0 Federation Server
  4. Migrate the AD FS 2.0 Federation Server Proxy


10. Switching Office 365 Identity Model from Cloud Only to Federated (ADFS)

Another scenario you might come across (as I did) is an organization who has deployed Office 365 with cloud only identities, but now want to switch to a Federated Identity model (ADFS).

As described in this blog by the Office 365 team,  Office 365 has 3 identity models:

  1. Cloud Identity:                Accounts are created and managed in Office 365 and stored in Azure Active Directory.  There is no connection to the on premise active directory
  2. Synchronized Identity: The on premise accounts and password hashes are synchronized to Office 365.  Authentication takes place in the Azure Active Directory
  3. Federated Identity: The on premise accounts are synchronized to Office 365.  Authentication takes place in the on premise Active Directory using ADFS

It is possible to migrate from Cloud Identity to Federated Identity.  However, it is a two stage process:

  1. Stage 1: Cloud to Synchronize
    1. The on premise directory is synchronized with Office 365 and the accounts “merged” with the cloud identities
  2. Stage 2: Synchronized to Federated
    1. The domain is converted to a federated domain


11. ADFS Backup

A backup (copy) of the following are needed in order to restore / recover the ADFS infrastructure:

  1. Details of the ADFS Service Account
  2. An export of the SSL certificate including the private key
  3. An export of the ADFS configuration

 The process to collect this data is described in detail in the Prepare to Migrate a WID Farm > Export Service Settings section of the following:


12. Troubleshooting ADFS

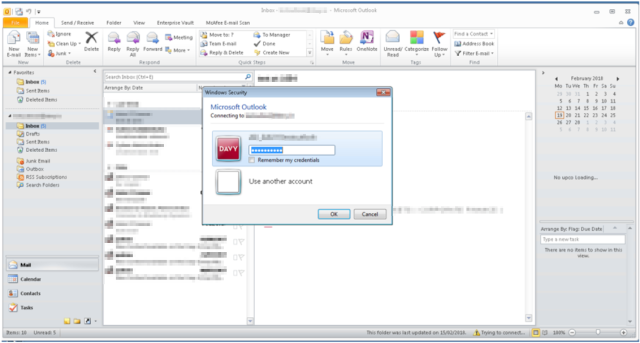
You can verify if ADFS is working by browsing to the following address (both internally and externally)

https://sts.domain.com/adfs/ls/IdpInitiatedSignon.aspx

(Replace the sts.domain.com with the name space for your own ADFS)

ADFSTS1

Click “Sign in”

If you are prompted for credentials, enter your UPN login and password

ADFSTS2

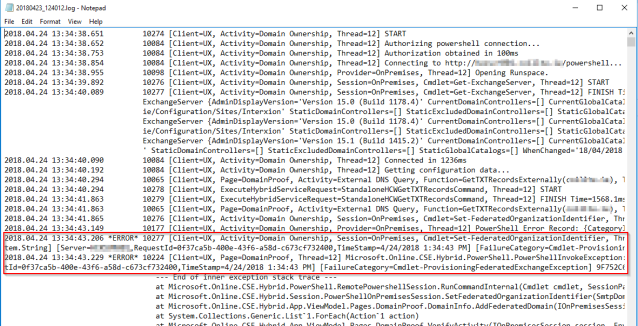
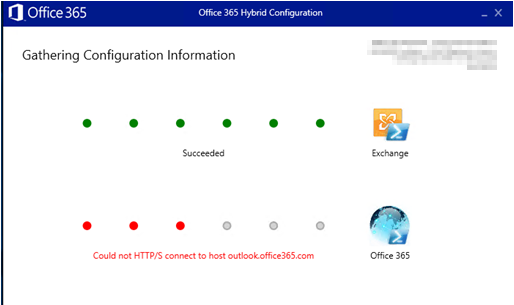
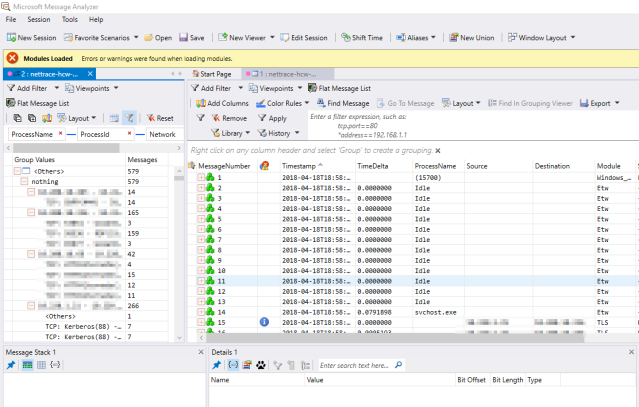
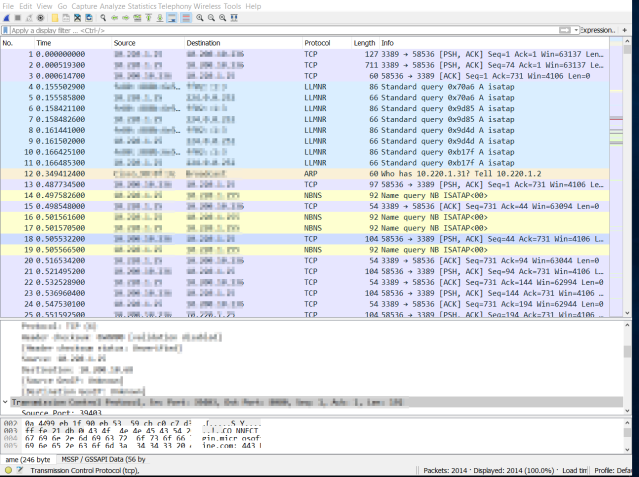
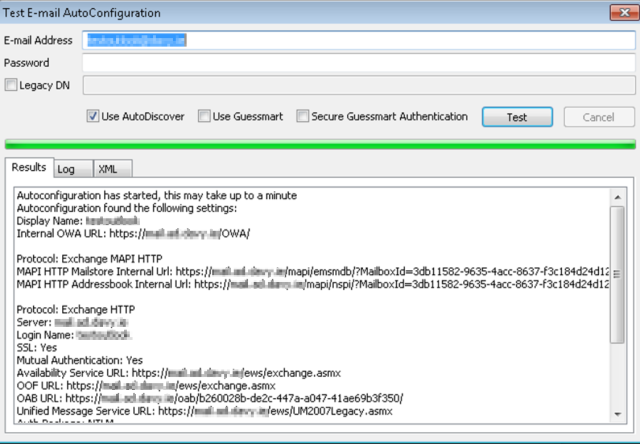
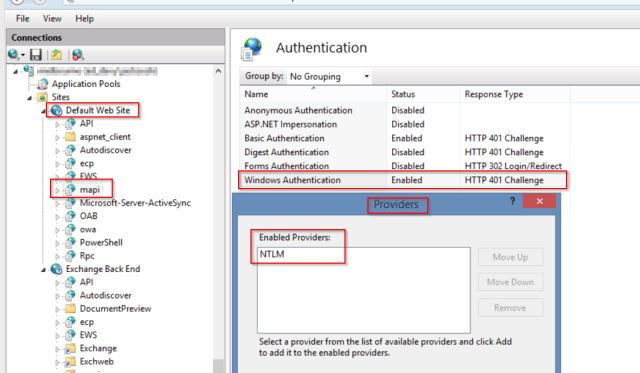
Confirm you are signed in.  If this is not working, then you can use the following troubleshooting resources:

  • Run the Microsoft ADFS Connectivity Analyzer Tool from here

ADFSTS3

13. What if ADFS can’t be recovered?

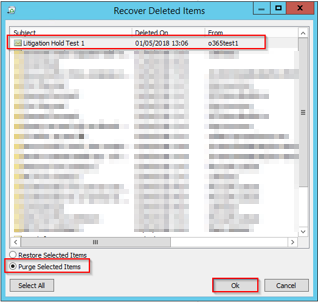
There is one other recovery mechanism that I have come across in the event that the ADFS infrastructure is unavailable or can’t be recovered.  And that is to disable federation of your domain.  This will effectively change your Office 365 authentication mechanism from Single Sign On (Federated) to Same Sign On (Synchronized).   The Office 365 request will authenticate against the synchronized account in Office 365 Directory, and not against the on-premise account.  Note: One small (and important) requirement – password synchronization is enabled with ADDSync (DirSync)

This scenario and the procedure is described by Exchange MVP Gary Steere  on his blog here

Note:  This is a different process from the Technet description of disabling federation using the Convert-MsolDomainToStandard command because this requires ADFS to be available

To disable federation:

  1. Click theMicrosoft Azure Active Directory Module for Windows PowerShell shortcut to open a Windows PowerShell workspace that has the cmdlets
  2. Run the following commands to connect PowerShell to Azure Active Directory
  • $msolcred = get-credential
  • connect-msolservice -credential $msolcred
  1. Run the following command:
  • Set-MsolDomainAuthentication -DomainName mydomain.com –Authentication Managed

Tip:         Always enable password synchronization with DirSync, even if you going to use ADFS for authentication

As always, I welcome constructive comments and feedback
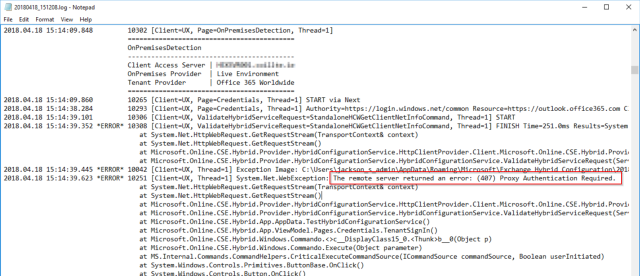
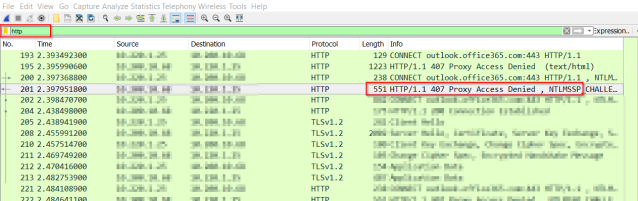
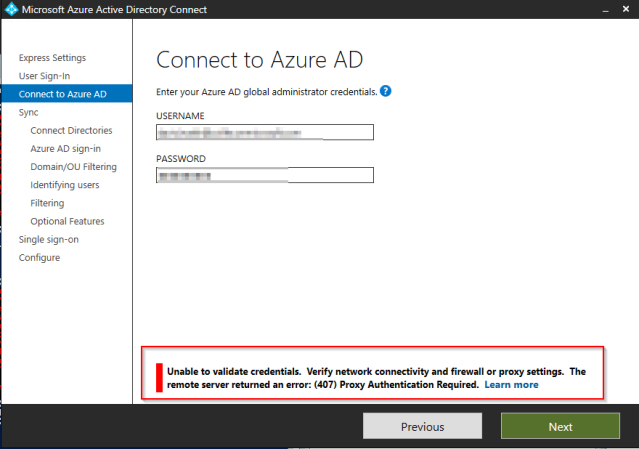
Microsoft Office 365 Support and Recovery Assistant

Back in May Microsoft released the beta for a new support tool called the Microsoft Office 365 Support and Recovery Assistant.

This tool can be downloaded from here

This tool can be used to help troubleshoot Office 365 account or profile related Outlook issues. When you launch this tool, you will be asked for your O365 credentials

Support&RecoveryAssistant1

Once authenticated, you will be prompted to select one of two scenarios for troubleshooting

Support&RecoveryAssistant2

For the first scenario, the tool must be run on the affected client. The tool will then run a series of checks to help identify the root cause of the issue

Support&RecoveryAssistant3

It will then list any issues found and offer suggestions to fix

Support&RecoveryAssistant4

There are more scenarios in development, so please leave feedback to help improve this very useful tool

Support&RecoveryAssistant5

Links to content, scripts and tools from MSIgnite 2015

msignite

For anyone that missed MSIgnite this year in Chicago, see below for a list of links to content, scripts and tools from the sessions:

How to migrate Resource (room) mailboxes to Office 365

This guide is based on an Exchange 2013 Hybrid environment and describes the steps required to migrate resources mailboxes (in this case Room mailboxes) from On-premise Exchange to Exchange Online (Office 365)

Step 1:          Connect to Exchange Online via Powershell

Open Windows PowerShell and run the following command:

$UserCredential = Get-Credential

ResourceMailbox-1

When prompted, type your Exchange Online user name and password

ResourceMailbox-2

Run the following command:

$Session = New-PSSession -ConfigurationName Microsoft.Exchange -ConnectionUri https://outlook.office365.com/powershell-liveid/ -Credential $UserCredential -Authentication Basic –AllowRedirection

ResourceMailbox-3

Run the following command:

Import-PSSession $Session

ResourceMailbox-4

You are now connected to Exchange Online via powershell

Step 2:          Move Resource (Room) Mailbox to Exchange Online via Powershell

Run the following command:

$OnPremAdmin=Get-Credential

When prompted, enter the on-premises administrator credentials.

Run the following command:

New-MoveRequest –identity “UPN of mailbox to be migrated” -Remote -RemoteHostName “FQDN of your hybrid server(s) e.g. hybrid.yourdomain.com” -RemoteCredential $OnPremAdmin -TargetDeliveryDomain “yourdomain.mail.onmicrosoft.com”

ResourceMailbox-5

The resource mailbox is now queued for migration